Silky Chocolate Pudding Cups
Highlighted under: Sweet Treats
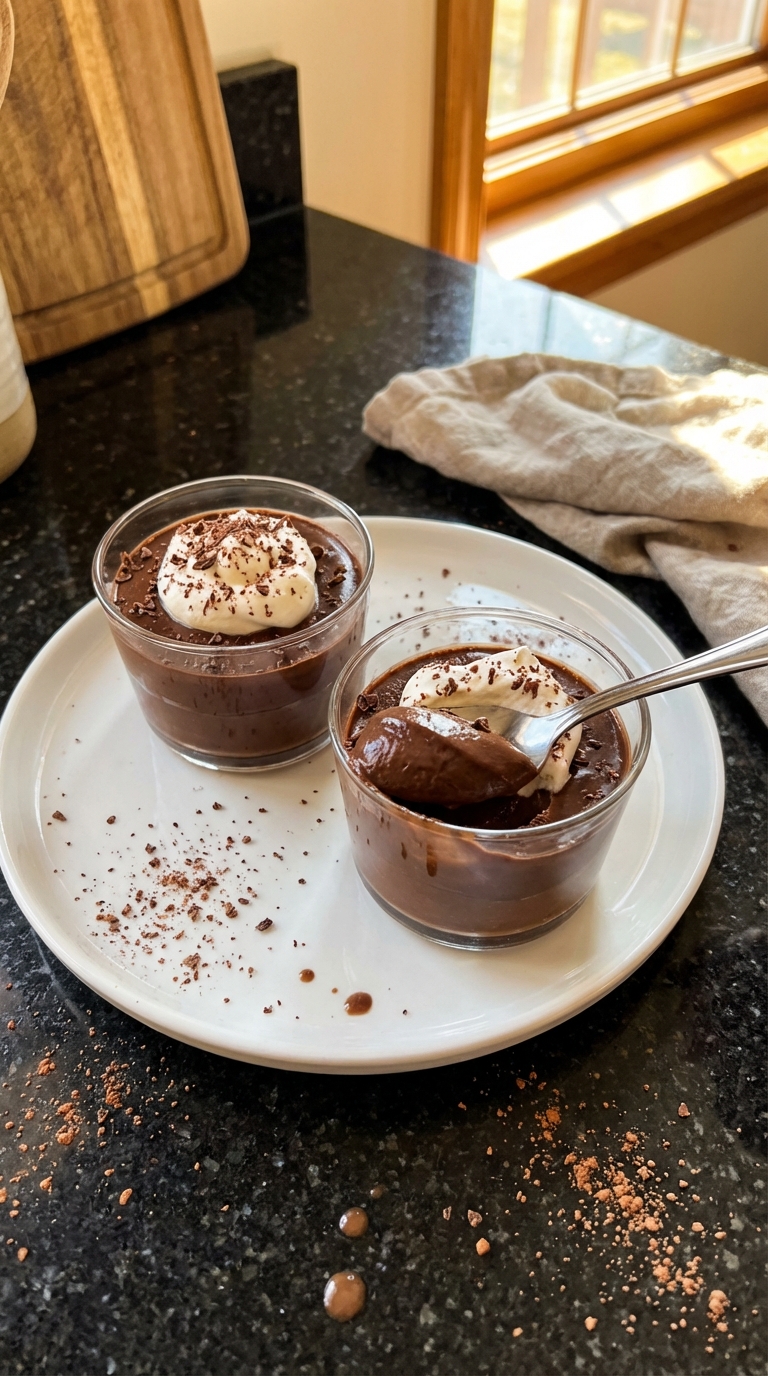
I absolutely adore making these Silky Chocolate Pudding Cups whenever I'm in need of a quick yet indulgent dessert. They come together in minutes and offer a luxurious chocolate experience that feels amazing, whether it's a special occasion or just a treat for myself. The smoothness and depth of flavor are unparalleled, especially when paired with fresh whipped cream or a sprinkle of sea salt. You won't believe how simple they are to whip up, perfect for any chocolate lover out there!
When I first tried making chocolate pudding from scratch, I never thought it would be this easy. The key lies in whisking the chocolate mixture constantly while it cooks; this ensures a velvety texture without any lumps. Pairing it with high-quality chocolate makes a world of difference, enhancing the taste and richness.
What I love most is that these pudding cups are incredibly versatile. You can dress them up with toppings like caramel, nuts, or fruits, or keep them simple for a comforting treat. Each cup is a chocolate lover’s dream come true, and they disappear quickly!
Why You Will Love This Recipe
- Rich chocolate flavor paired with fresh orange zest
- Creamy texture that melts in your mouth
- Perfect for celebrations or as a sweet indulgence
Achieving the Perfect Texture
The key to achieving a wonderfully smooth texture in your Silky Chocolate Pudding Cups lies in how you combine the ingredients. Carefully whisk the cornstarch and dry ingredients before adding the milk to avoid lumps. When you cook the mixture, keep the heat at medium level and stir constantly to prevent sticking and burning. A good visual cue to know it's ready is when the mixture thickens, coats the back of a spoon, and starts to bubble gently, which usually takes about five minutes.
Once you incorporate the chopped chocolate, allow it to melt completely without returning to the heat. This helps maintain the pudding's creamy consistency and prevents it from becoming grainy. Always ensure that the chocolate is evenly distributed throughout the mixture for a rich, uniform flavor in every bite.
Customizing Your Chocolate Experience
Feel free to experiment with flavors by adding a splash of espresso or coffee extract to the mixture when cooking; this elevates the chocolate profile and adds depth. Alternatively, for a fruity note, consider mixing in some orange zest when stirring in the chocolate. This not only brightens the dessert but also complements the rich chocolate flavor beautifully, offering a sophisticated twist.
If you're looking for a dairy-free option, you can substitute the whole milk with almond milk or oat milk. However, keep in mind that using alternative milks may slightly alter the pudding's texture, so opt for unsweetened varieties to ensure the sweetness comes from the sugar alone.
Storing and Serving Suggestions
To store your Silky Chocolate Pudding Cups, keep them covered with plastic wrap in the refrigerator for up to three days. Be sure that the plastic wrap touches the surface to prevent a skin from forming, which can detract from the smooth mouthfeel. You can also prepare the pudding ahead of time for gatherings, allowing flavors to meld and intensify overnight.
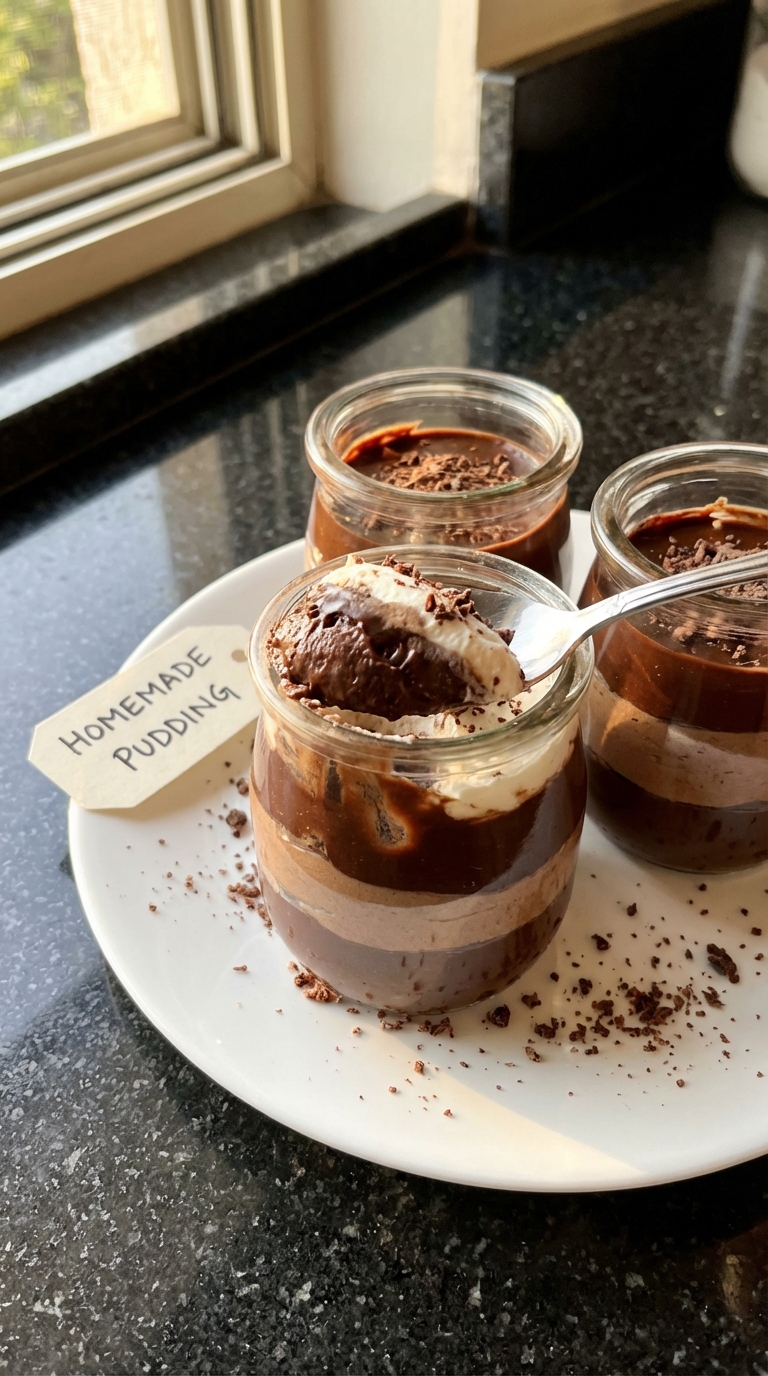
When serving, fresh whipped cream adds an airy contrast to the pudding's richness. For an elegant touch, consider garnishing with chocolate shavings or a sprinkle of flaky sea salt to enhance the chocolate flavor. You could also serve it in a decorative glass for an appealing presentation, making it perfect for dinner parties or special occasions.
Ingredients
For the Pudding
- 2 cups whole milk
- 1/2 cup granulated sugar
- 1/4 cup unsweetened cocoa powder
- 3 tablespoons cornstarch
- 1/4 teaspoon salt
- 4 ounces semisweet chocolate, chopped
- 1 teaspoon vanilla extract
For the Topping
- Whipped cream
- Chocolate shavings or cocoa powder
Instructions
Combine Dry Ingredients
In a medium saucepan, whisk together the sugar, cocoa powder, cornstarch, and salt until well combined.
Add Milk
Gradually whisk in the whole milk and continue whisking until the mixture is smooth.
Cook the Pudding
Place the saucepan over medium heat and cook, stirring constantly, until the mixture thickens and comes to a gentle boil, about 5 minutes.
Add Chocolate and Vanilla
Remove the saucepan from heat and stir in the chopped chocolate and vanilla extract until smooth.
Chill the Pudding
Transfer the pudding into individual cups or bowls and cover with plastic wrap, ensuring the wrap touches the surface to prevent a skin from forming. Chill in the refrigerator for at least 2 hours.
Serve
Before serving, top with whipped cream and chocolate shavings or a dusting of cocoa powder, if desired.
Pro Tips
- For an extra layer of flavor, try adding a teaspoon of instant coffee granules to the dry ingredients. It enhances the chocolate flavor without making the pudding taste like coffee.
Common Troubleshooting Tips
If your pudding doesn't thicken as expected, it may be due to inadequate heat or not cooking long enough. Be persistent; simmering for an additional 1 or 2 minutes usually resolves this. If you find the pudding lumpy after cooking, blending it with an immersion blender can smooth out any inconsistencies without needing to start over.
Conversely, if the pudding becomes too thick, you can stir in a splash of milk over low heat to loosen it up, bringing it back to a creamy consistency before chilling. Always taste before serving to ensure the sweetness and flavor balance are just right.
Scaling the Recipe
This recipe is easily scalable, whether you want a single serving or a larger batch for a gathering. To double the recipe, simply double all the ingredients, ensuring to use a larger saucepan to accommodate the increased volume while cooking. Be mindful that cooking time might be slightly longer since there’s more mixture to heat through.
If you wish to serve smaller portions, consider using shot glasses or small ramekins. These not only look charming but also allow for a more varied dessert spread if you’re offering multiple flavors or toppings alongside the chocolate pudding.
Questions About Recipes
→ Can I use dark chocolate instead of semisweet?
Yes, using dark chocolate will intensify the flavor and create a richer pudding.
→ How long will the pudding keep in the fridge?
The pudding can be stored in the refrigerator for up to 3 days, covered tightly.
→ Can I make this pudding vegan?
Yes! Substitute the whole milk with any plant-based milk and the semisweet chocolate with a dairy-free version.
→ Is it necessary to chill the pudding?
Chilling allows the pudding to set properly and enhances its creamy texture, so it's recommended.
Silky Chocolate Pudding Cups
Created by: The Simplecooktips Team
Recipe Type: Sweet Treats
Skill Level: easy
Final Quantity: 4 servings
What You'll Need
For the Pudding
- 2 cups whole milk
- 1/2 cup granulated sugar
- 1/4 cup unsweetened cocoa powder
- 3 tablespoons cornstarch
- 1/4 teaspoon salt
- 4 ounces semisweet chocolate, chopped
- 1 teaspoon vanilla extract
For the Topping
- Whipped cream
- Chocolate shavings or cocoa powder
How-To Steps
In a medium saucepan, whisk together the sugar, cocoa powder, cornstarch, and salt until well combined.
Gradually whisk in the whole milk and continue whisking until the mixture is smooth.
Place the saucepan over medium heat and cook, stirring constantly, until the mixture thickens and comes to a gentle boil, about 5 minutes.
Remove the saucepan from heat and stir in the chopped chocolate and vanilla extract until smooth.
Transfer the pudding into individual cups or bowls and cover with plastic wrap, ensuring the wrap touches the surface to prevent a skin from forming. Chill in the refrigerator for at least 2 hours.
Before serving, top with whipped cream and chocolate shavings or a dusting of cocoa powder, if desired.
Extra Tips
- For an extra layer of flavor, try adding a teaspoon of instant coffee granules to the dry ingredients. It enhances the chocolate flavor without making the pudding taste like coffee.
Nutritional Breakdown (Per Serving)
- Calories: 380 kcal
- Total Fat: 26g
- Saturated Fat: 15g
- Cholesterol: 195mg
- Sodium: 85mg
- Total Carbohydrates: 32g
- Dietary Fiber: 3g
- Sugars: 24g
- Protein: 6g