Homemade Pita Bread Fluffy
Highlighted under: World Cuisine
Learn how to make fluffy homemade pita bread that is perfect for filling with your favorite ingredients.
Making pita bread at home is not only rewarding but also allows you to enjoy fresh, fluffy pitas that are perfect for wraps, dips, or just enjoying on their own.
Why You Will Love This Recipe
- Soft and fluffy texture that everyone loves
- Easy to make with just a few simple ingredients
- Versatile for various fillings and toppings
- Perfect for serving with dips like hummus or tzatziki
The Art of Pita Bread Making
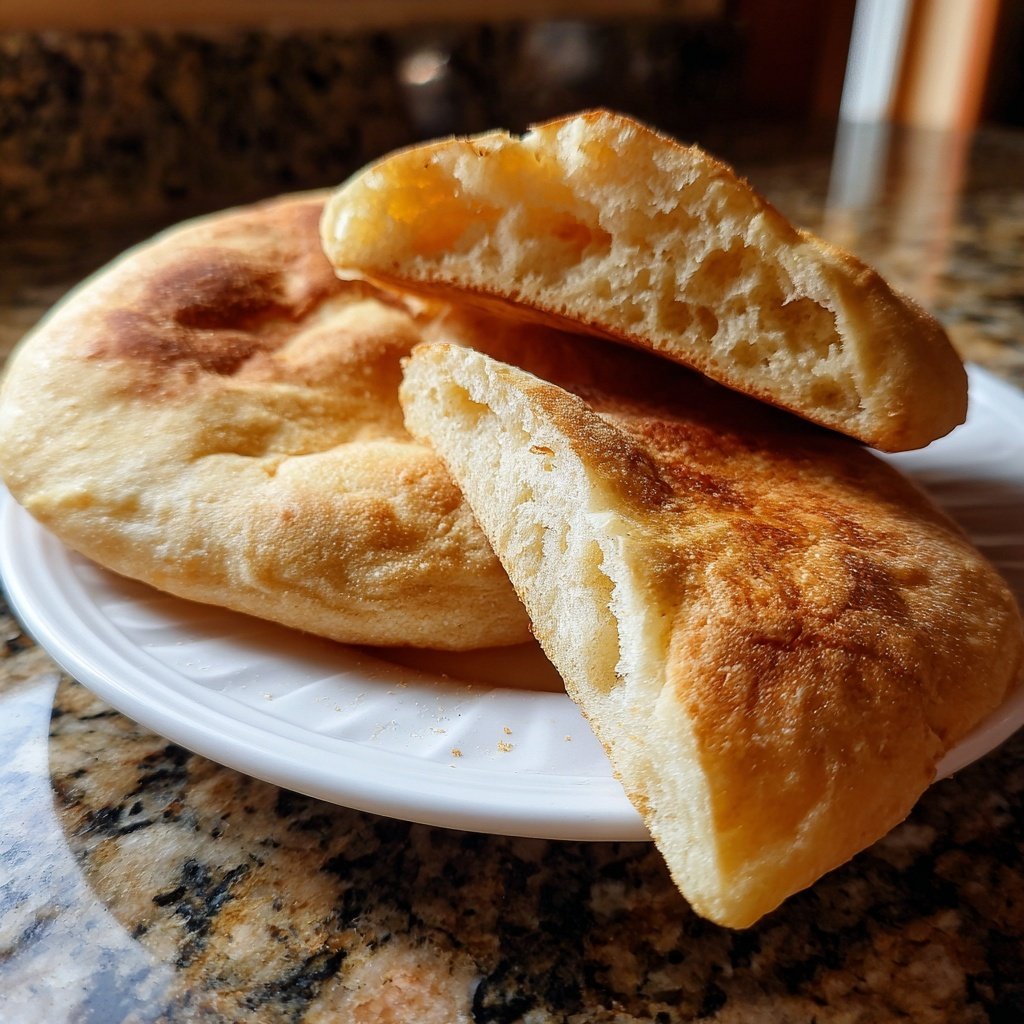
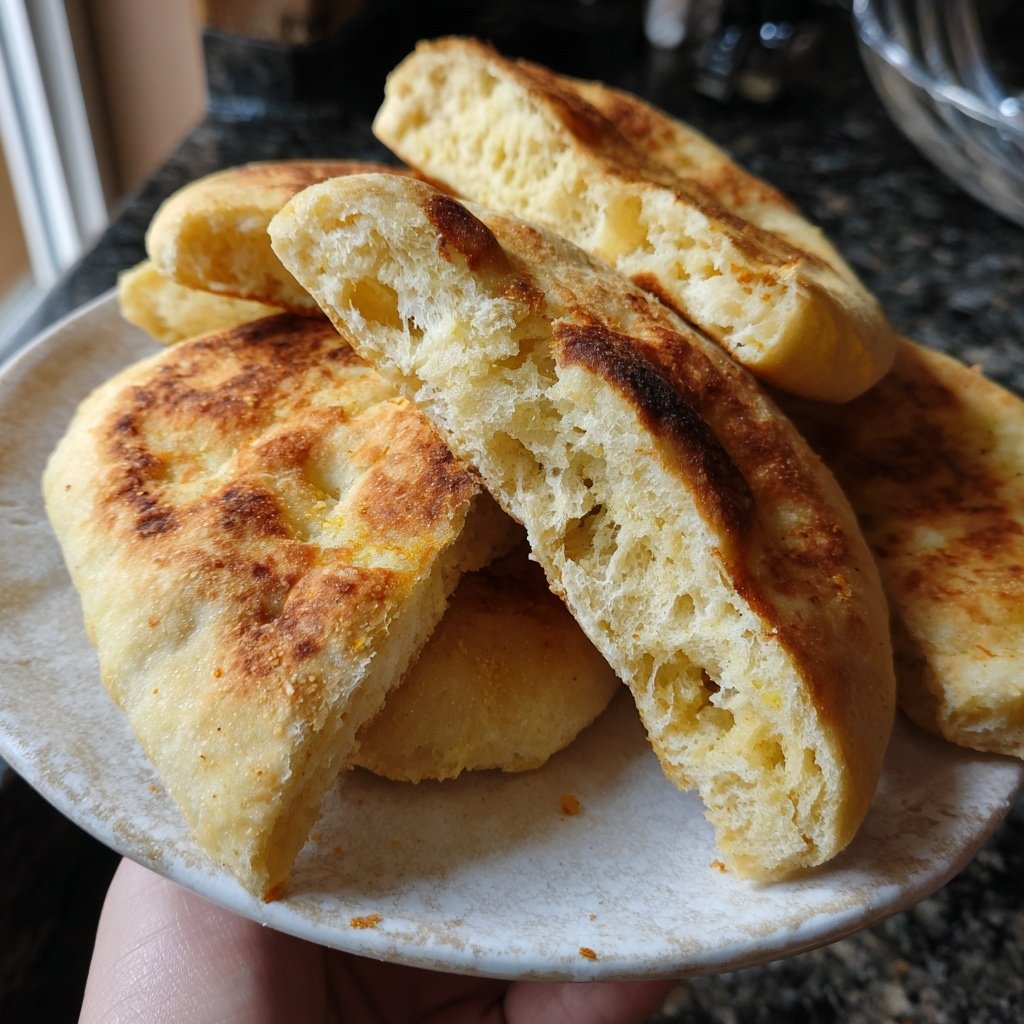
Making pita bread at home is a delightful experience that not only fills your kitchen with a warm, inviting aroma but also brings a sense of accomplishment. The process is simple yet rewarding, allowing you to enjoy fresh bread that’s far superior to store-bought options. With just a handful of ingredients, you can create fluffy pitas that are perfect for sandwiches, wraps, or dipping. This recipe is approachable for beginners while still delivering impressive results.
One of the key aspects of making great pita bread is the yeast. Properly activating the yeast is crucial, as it helps the dough rise and creates that signature puffed pocket in the bread. This pocket is what makes pita bread so versatile, allowing you to stuff it with your favorite fillings, from savory meats and vegetables to sweet spreads. Mastering this technique will elevate your bread-making skills.
Additionally, the kneading process plays a vital role in developing the gluten structure, which contributes to the softness and elasticity of the final product. Investing a few extra minutes into kneading the dough will pay off with perfectly fluffy pitas that are sure to impress your family and friends.
Serving Suggestions
Homemade pita bread is incredibly versatile, making it an ideal vessel for a wide variety of fillings. Stuff it with grilled chicken, fresh vegetables, and your favorite sauces for a delicious sandwich that’s perfect for lunch or dinner. For a lighter option, consider filling it with a vibrant salad, topped with crumbled feta and a drizzle of olive oil.
If you're hosting a gathering, consider serving your pita bread alongside an array of dips. Classics like hummus, tzatziki, and baba ganoush pair perfectly with the fluffy texture of homemade pitas. This creates a delightful appetizer spread that will have your guests raving about your culinary skills.
Don’t forget about sweet options! Pitas can be turned into a dessert by filling them with yogurt, honey, and fresh fruits for a delightful treat. The possibilities are endless, and experimenting with different fillings is part of the fun of making homemade pita bread.
Storage and Reheating Tips
Ingredients
Ingredients
For the Pita Bread
- 2 cups all-purpose flour
- 1 teaspoon salt
- 1 teaspoon sugar
- 1 tablespoon olive oil
- 1 packet (2 1/4 teaspoons) active dry yeast
- 3/4 cup warm water (about 110°F)
Make sure all ingredients are at room temperature for the best results.
Instructions
Instructions
Activate the Yeast
In a small bowl, combine warm water, sugar, and yeast. Let it sit for about 5 minutes until frothy.
Mix the Dough
In a large mixing bowl, combine flour and salt. Add the olive oil and the activated yeast mixture. Stir until a dough forms.
Knead the Dough
Transfer the dough to a floured surface and knead for about 5 minutes until smooth and elastic.
Let the Dough Rise
Place the dough in a greased bowl, cover with a damp cloth, and let it rise in a warm place for about 1 hour, or until doubled in size.
Shape the Pitas
Punch down the risen dough and divide it into 8 equal pieces. Roll each piece into a ball and then flatten it into a circle about 1/4 inch thick.
Cook the Pitas
Heat a skillet or griddle over medium-high heat. Cook each pita for 2-3 minutes on each side, or until puffed and lightly browned.
Serve
Remove from heat and cover with a cloth to keep warm. Serve immediately or store in an airtight container.
Enjoy your homemade pita bread with your favorite dips or fillings!
Pro Tips
For softer pitas, cook them for a shorter time and make sure to keep them covered.
Tips for Success
For the best results, ensure that your water temperature is just right when activating the yeast. If it’s too hot, it may kill the yeast, while water that’s too cold won’t activate it properly. Aim for a temperature of about 110°F, which is warm to the touch but not scalding.
Additionally, if you live in a humid environment, you may need to adjust the amount of flour you use. Always add flour gradually until the dough is smooth and elastic. On the flip side, in dry climates, you might need a little more water to achieve the right consistency.
Finally, feel free to experiment with different flours. While all-purpose flour is the traditional choice, using whole wheat flour or a combination can add a delightful nutty flavor and additional nutrients to your homemade pita bread.
Common Mistakes to Avoid
One common mistake when making pita bread is skipping the kneading step. Kneading develops gluten, which gives the bread its structure and helps it rise properly. Don’t rush this step; take the time to knead until the dough is smooth and elastic for the best results.
Another pitfall is not allowing the dough enough time to rise. If your dough doesn’t double in size, your pitas may end up dense and flat instead of light and fluffy. Be patient and give the dough the time it needs to rise in a warm place.
Lastly, avoid cooking the pitas on too low of heat. While it might be tempting to cook them slowly, a hot skillet is essential to create the puff that characterizes pita bread. Medium-high heat is recommended to achieve perfectly cooked pitas with a lovely golden-brown exterior.
Questions About Recipes
→ Can I use whole wheat flour?
Yes, you can substitute half or all of the all-purpose flour with whole wheat flour for a healthier option.
→ How can I store leftover pita bread?
Store leftover pita bread in an airtight container at room temperature for up to 2 days, or freeze for longer storage.
→ Why did my pitas not puff up?
If the dough is too cold or not rolled out evenly, the pitas may not puff. Ensure your dough is at room temperature and rolled evenly.
→ Can I add herbs or spices to the dough?
Absolutely! You can add dried herbs like oregano or garlic powder to the dough for extra flavor.
Homemade Pita Bread Fluffy
Created by: The Simplecooktips Team
Recipe Type: World Cuisine
Skill Level: Beginner
Final Quantity: 8 pitas
What You'll Need
For the Pita Bread
- 2 cups all-purpose flour
- 1 teaspoon salt
- 1 teaspoon sugar
- 1 tablespoon olive oil
- 1 packet (2 1/4 teaspoons) active dry yeast
- 3/4 cup warm water (about 110°F)
How-To Steps
In a small bowl, combine warm water, sugar, and yeast. Let it sit for about 5 minutes until frothy.
In a large mixing bowl, combine flour and salt. Add the olive oil and the activated yeast mixture. Stir until a dough forms.
Transfer the dough to a floured surface and knead for about 5 minutes until smooth and elastic.
Place the dough in a greased bowl, cover with a damp cloth, and let it rise in a warm place for about 1 hour, or until doubled in size.
Punch down the risen dough and divide it into 8 equal pieces. Roll each piece into a ball and then flatten it into a circle about 1/4 inch thick.
Heat a skillet or griddle over medium-high heat. Cook each pita for 2-3 minutes on each side, or until puffed and lightly browned.
Remove from heat and cover with a cloth to keep warm. Serve immediately or store in an airtight container.
Extra Tips
For softer pitas, cook them for a shorter time and make sure to keep them covered.
Nutritional Breakdown (Per Serving)
- Calories: 150 kcal
- Total Fat: 2g
- Saturated Fat: 0g
- Cholesterol: 0mg
- Sodium: 200mg
- Total Carbohydrates: 30g
- Dietary Fiber: 1g
- Sugars: 0g
- Protein: 5g